Generate Basic Code
1. Microcontroller Selection
Open
STM32CubeMX.Click
New Project.Select
MCU/MPU Selectorif you want to select microcontroller IC number or selectBoard Selectorif you want to select using development board number. For example, STM32F407G-DISC1 fromBoard Selectoror STM32F407VG fromMCU/MPU Selector.Select particular microcontroller from list on right side and click
Start Project.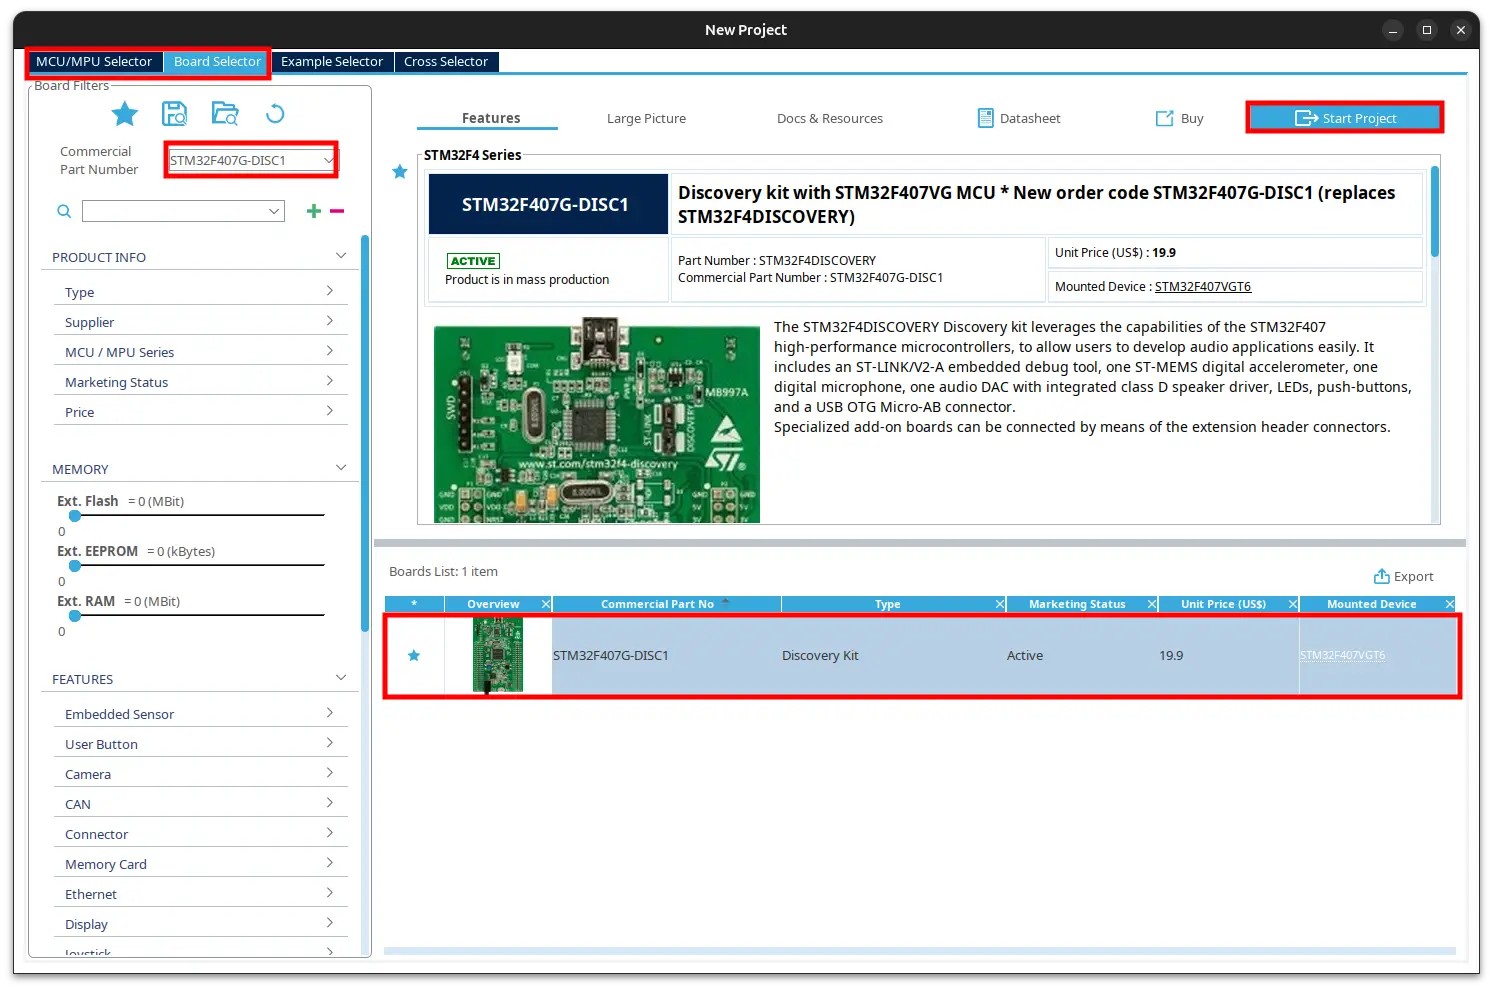
You might be asked to initialize peripheral with their default mode. Click No. But if you want to use default mode, click Yes.
2. Pinout & Configuration
Clear default pinouts by pressing
Ctrl + PandEnter. This is not recommended as some pins are already used with other peripherals on the board and might cause problems if you use them. But for now, just do as we are not using them.Go to
RCC > High Speed Clock (HSE)and selectCrystal Ceramic Resonator.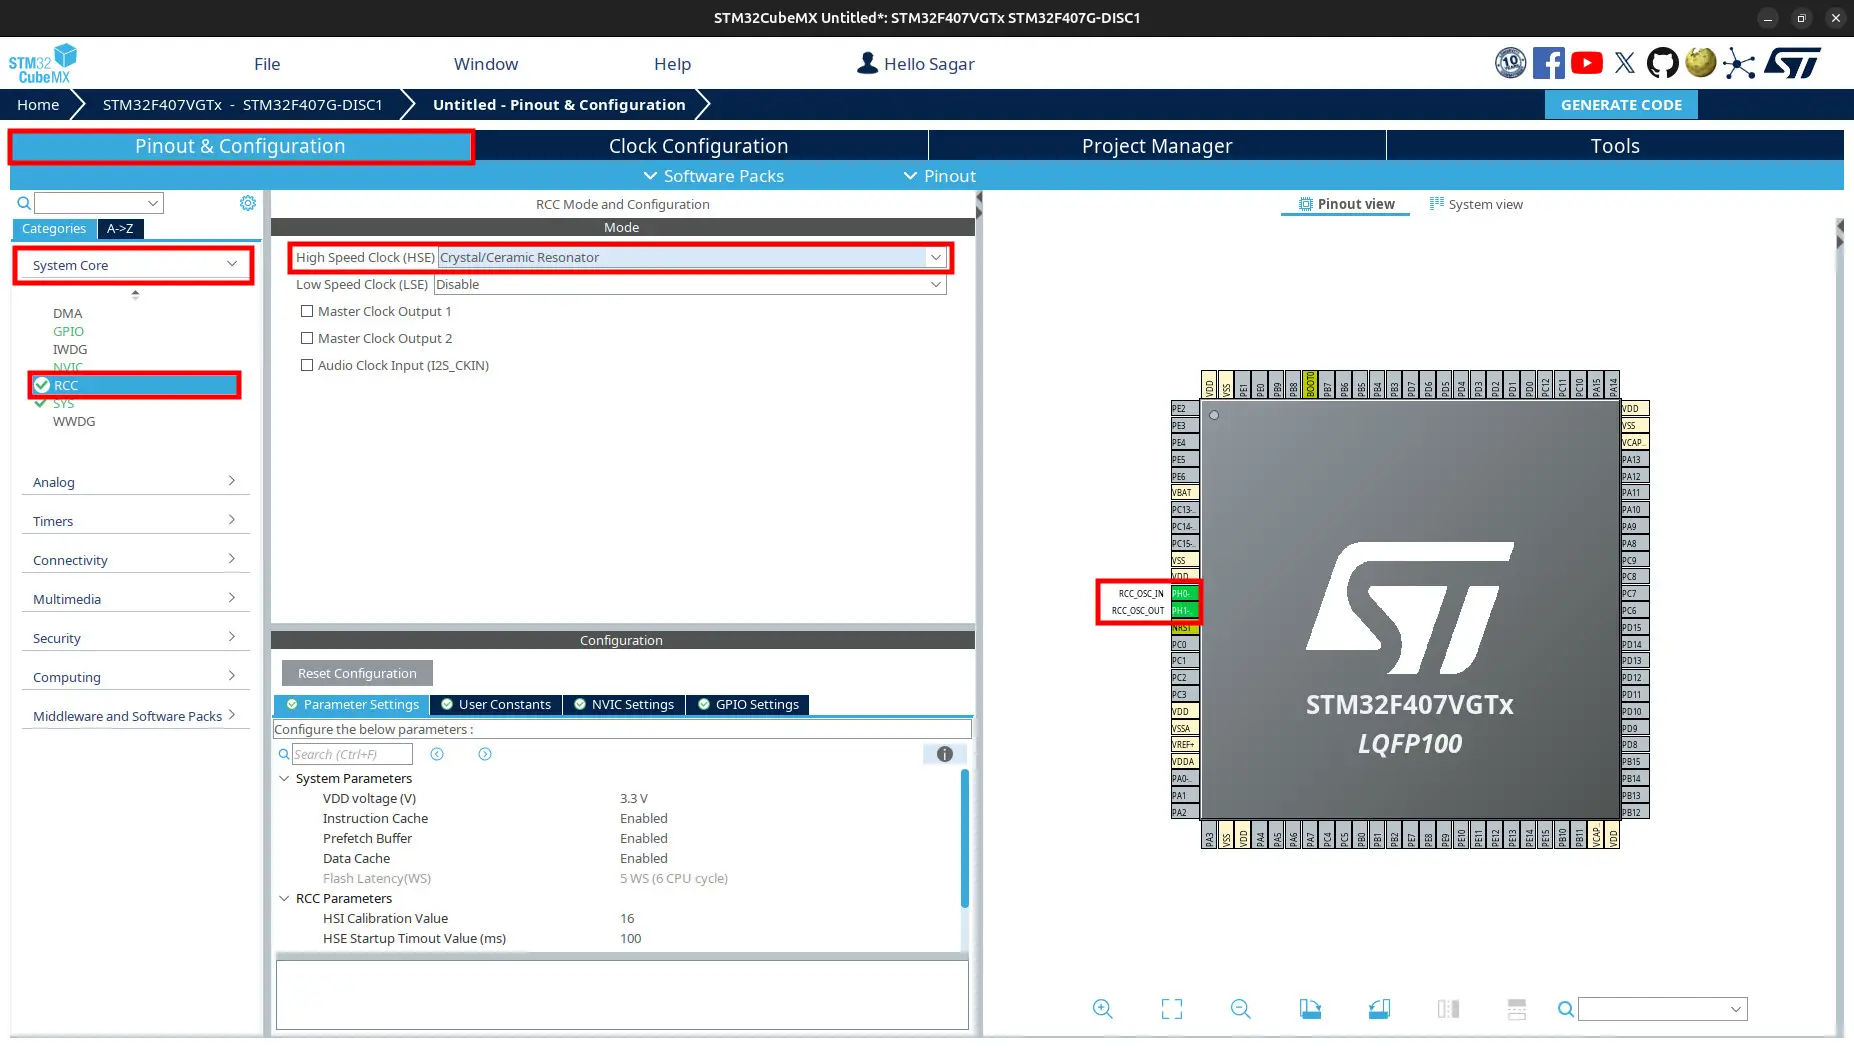
Go to
SYS > Debugand selectSerial Wire.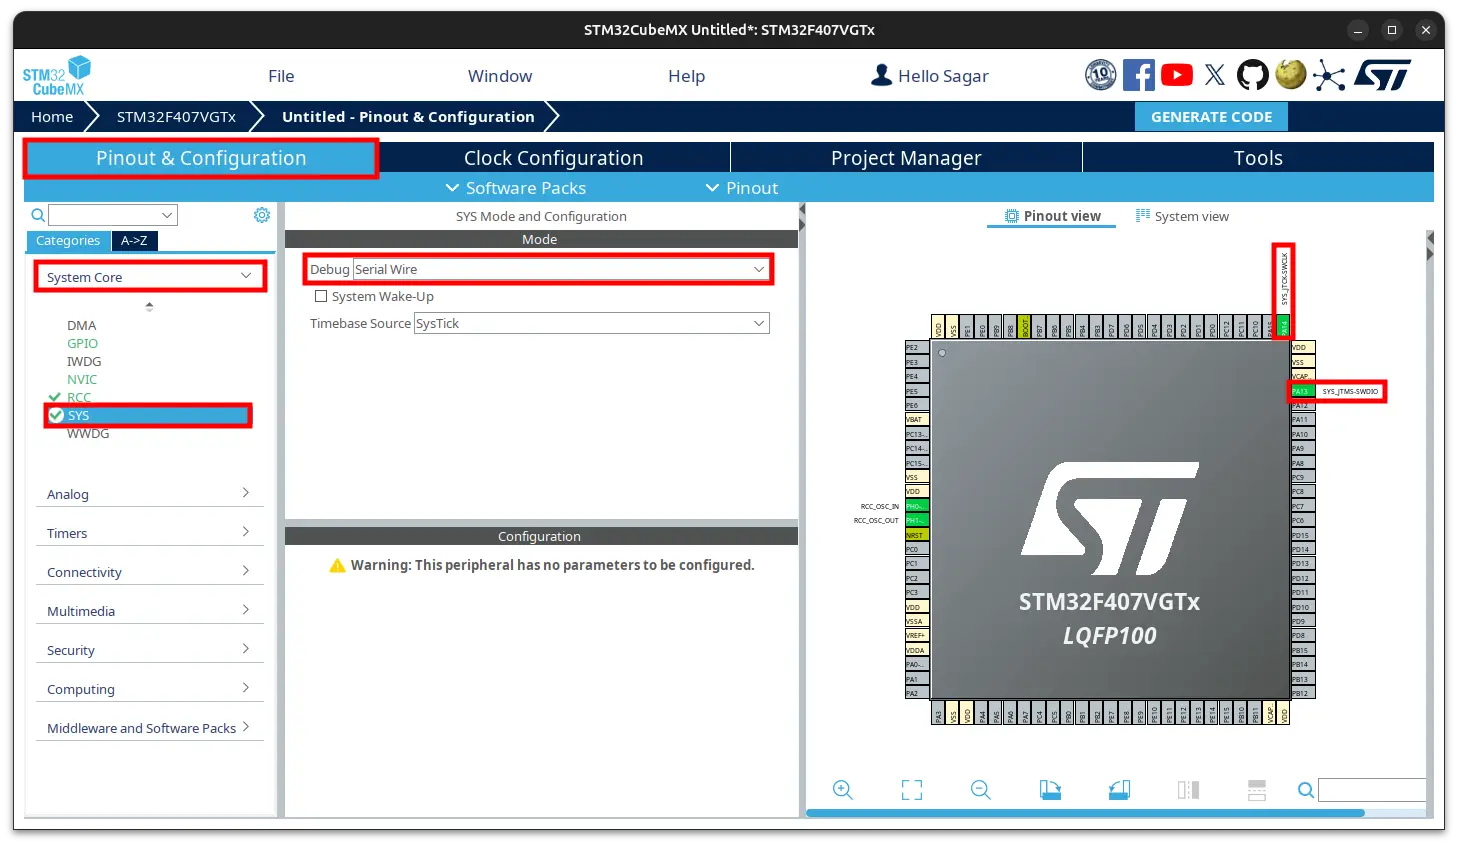
Important
ITM uses SWO. If you use ITM, select
Debugoption asTrace Asynchronous SWin STM32CubeMX configuration.
Now you can select pins for LED, UART, Timers and many more. But leave them for now.
3. Clock Configuration
Specify
HCLK (MHx). We prefer to use maximum clock frequency. For example, 168 MHz if using STM32F407VGT6 or 72 MHz if using STM32F103C8.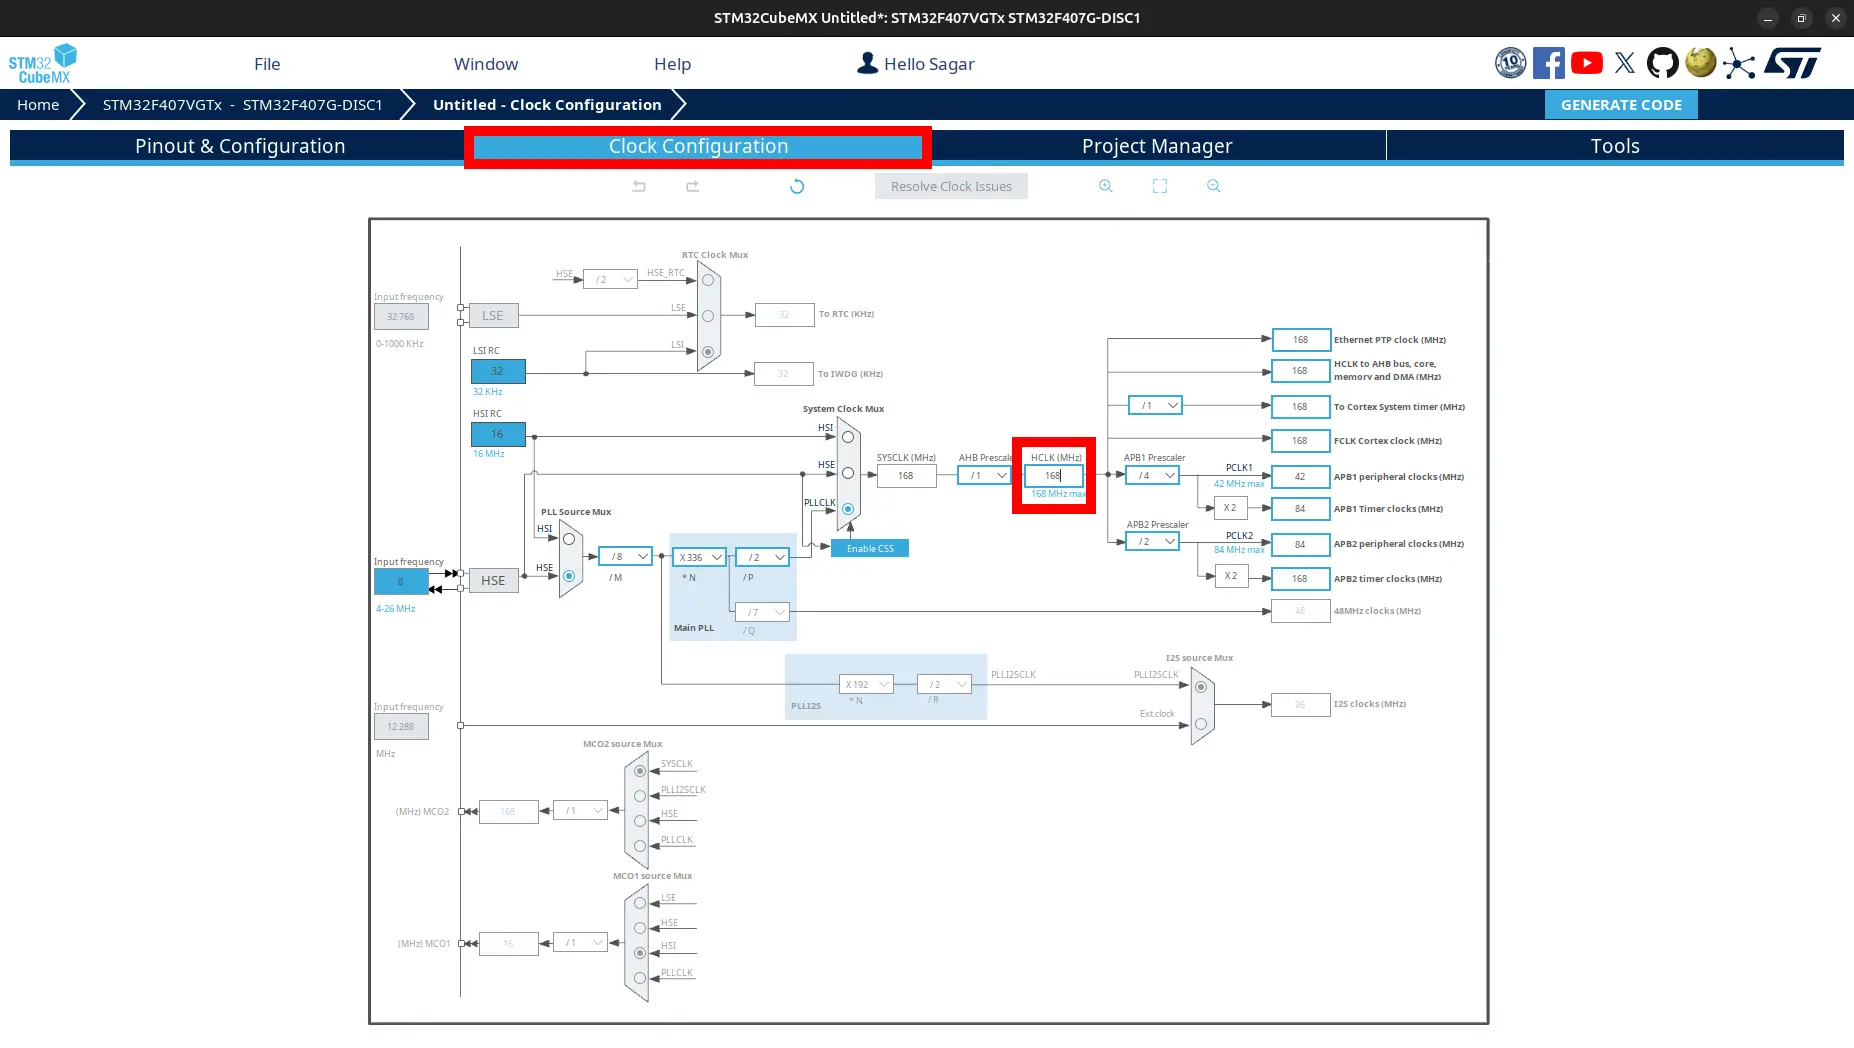
4. Project Manager
4.1. Project
Write
Project Name.Write
Project Location`.Select
Toolchanin/IDE. We prefer to choose Makefile. CMake is new in STM32CubeMX. You can use both parallelly without any problem as generating for one tool does not remove other tool. CubeIDE is the best as it has many features and easy to use but it is heavy so we do not use as much.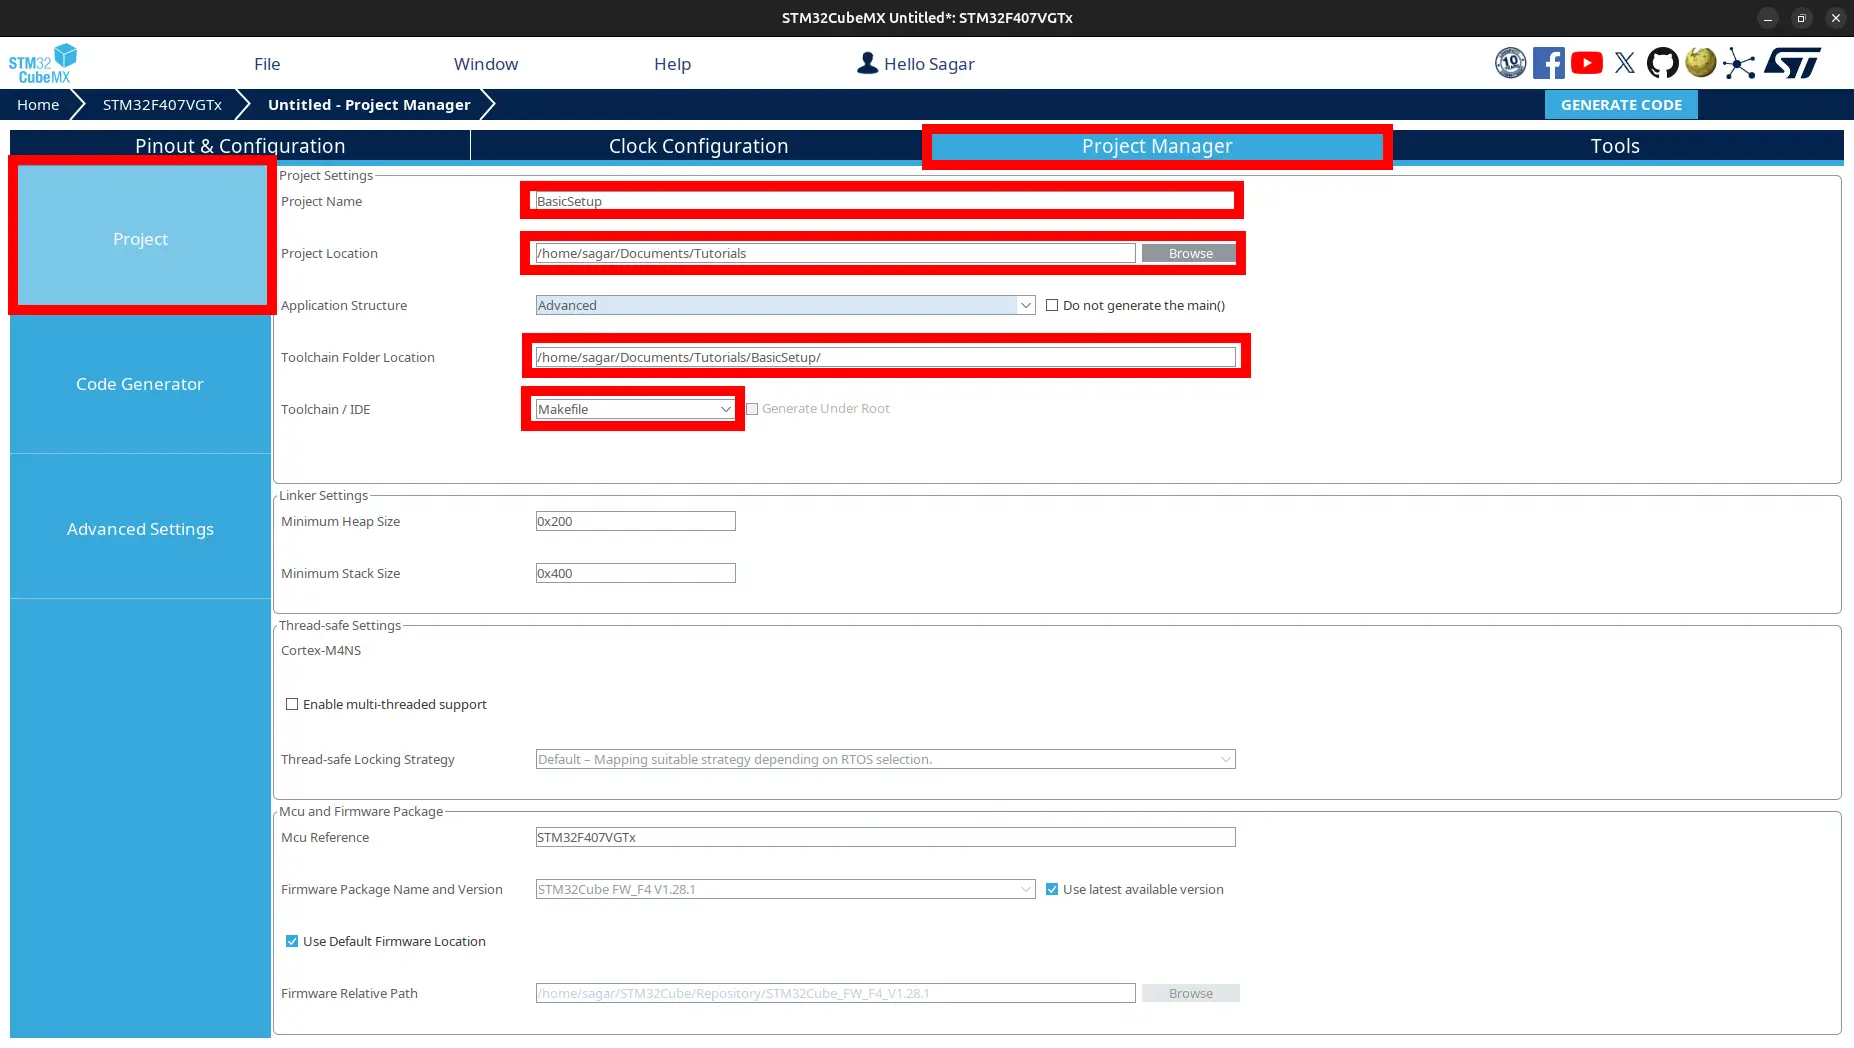
4.2. Code Generator
Select copy all used libraries in to the project folder.
Tick:
Generate peripheral initialization as a pair ‘.c/.h’ file per peripheral.
Keep user code when regenerating.
Delete priviously generated file when not in use.
Generate code by clicking
GENERATE CODE.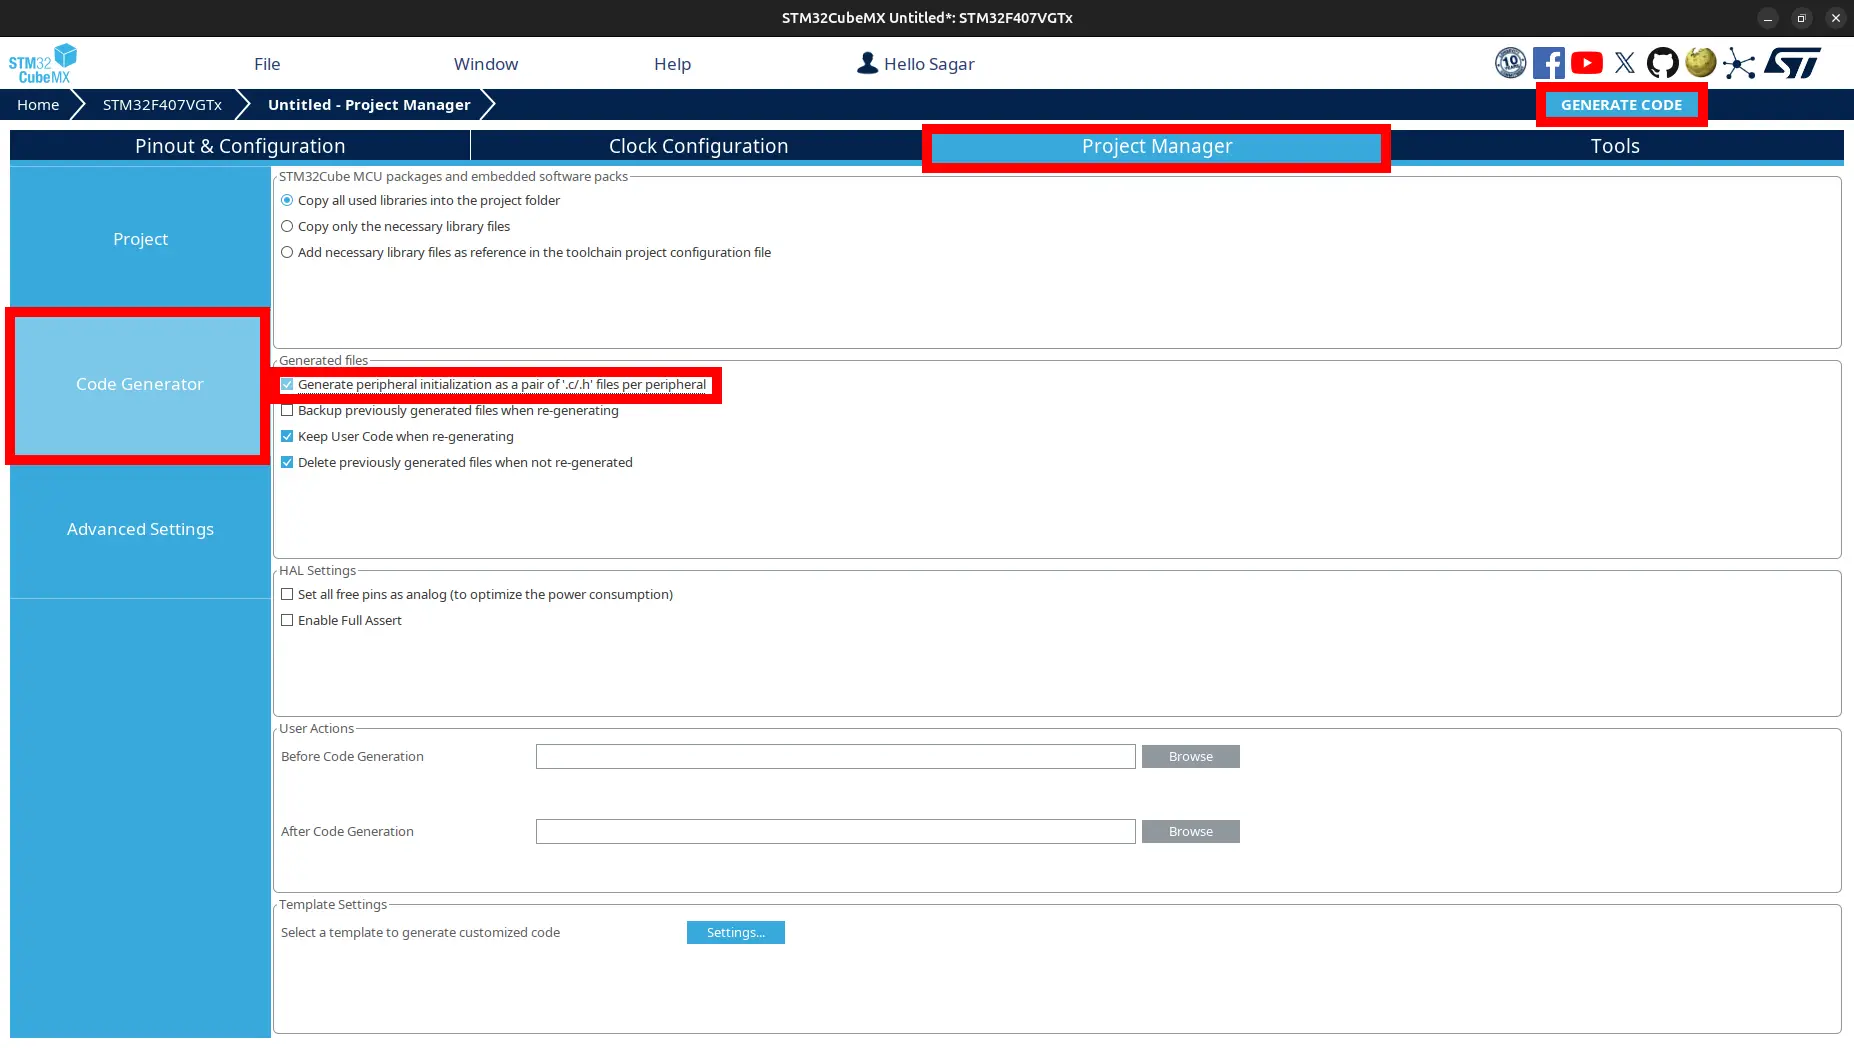
Navigate to project folder, open it using VSCODE. If you chose Makefile as your toolchain, you would find Makefile` in the project folder. If you chose CMake as your toolchain, you would find CMakeLists.txt in the project folder.
Tip
For practice, generate using both Makefile and CMake.