Print using SWD
Attention
ITM SWV Console does not work using our duplicate ST-Link V2 adapter. So using bluepill, USB is used for printf in our case.
Warning
SWV does not work in STM32F407VG-DISC1 board if you use PB3 pin because it is connected to SWO pin of ST-Link.
1. Introduction
SWD also can be used to print data. But we cannot get them normally. We need speacial program to see which is Serial Wire Viewer (SWV). STM32CubeProgrammer has SWV. Download it from installation.
In order to trace information, Instrumentation Trace Macrocell (ITM) is used in ARM processors. It uses SWO pin for tracing.
2. Overwrite printf Callback Function
Important
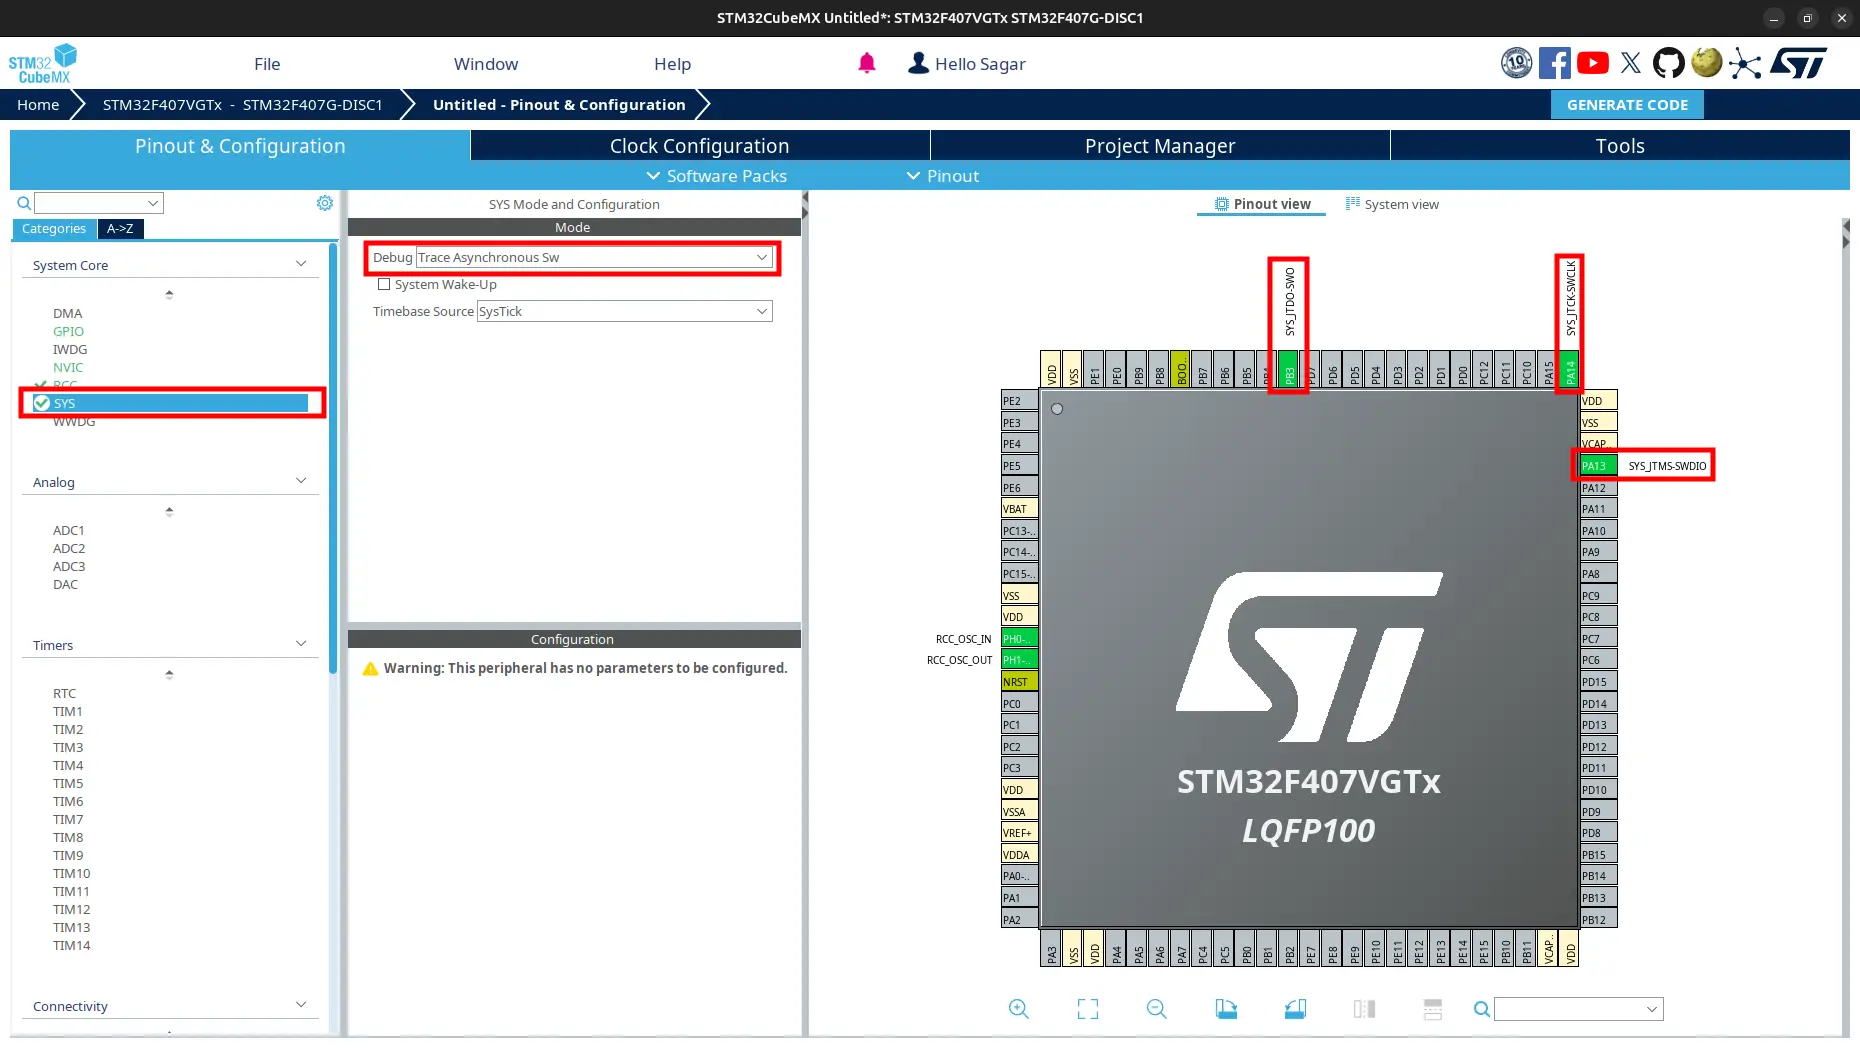
ITM uses SWO, so select Debug option as Trace Asynchronous SW in STM32CubeMX.
Create a new file
printf_conf.cinCore/Srcfolder.Add the following code to the file:
printf_conf.c1#include "stm32f4xx_hal.h" // for stm32f4 2 3 int _write(int file, char *data, int len) 4 { 5 for (int i = 0; i < len; ++i) 6 { 7 ITM_SendChar(data[i]); 8 } 9 return len; 10 }
3. Update Makefile or CMakeLists.txt
Add
printf_config.cto source.C_SOURCES = \ ... \ ... \ Core/Src/printf_conf.c# Add sources to executable target_sources(${CMAKE_PROJECT_NAME} PRIVATE # Add user sources here Core/Src/printf_conf.c )
Add
-u _printf_floatflag.Add to
LDFLAGS.LDFLAGS = $(MCU) -specs=nano.specs -T$(LDSCRIPT) $(LIBDIR) $(LIBS) -Wl,-Map=$(BUILD_DIR)/$(TARGET).map,--cref -Wl,--gc-sections LDFLAGS += -u _printf_float
Create target_link_options at the bottom.
# Add compiler flags
target_link_options(${CMAKE_PROJECT_NAME} PRIVATE
    -u _printf_float
)
4. Update main.c
Open
Core > Src > main.c. Addstdio.hheader./* Private includes ----------------------------------------------------------*/ /* USER CODE BEGIN Includes */ #include <stdio.h> /* USER CODE END Includes */
Update
mainfunction to print “Hello World” over SWD./* USER CODE BEGIN 2 */ uint32_t n = 0; /* USER CODE END 2 */ /* Infinite loop */ /* USER CODE BEGIN WHILE */ while (1) { printf ("Hello World! %lu\n", n++); HAL_Delay(100); /* USER CODE END WHILE */ /* USER CODE BEGIN 3 */ } /* USER CODE END 3 */
Build and flash.
5. Open SWV on STM32CubeProgrammer
5.1. Using STM32CubeProgrammer GUI
Open
STM32CubeProgrammer.Connect your microcontroller to your PC using USB cable through
ST-Link. If you use externaldebuggerlikeJLinkorST-Linkadapter, connect it as:SWCLKof microcontroller toSWCLKof debugger.SWDIOof microcontroller toSWDIOof debugger.SWOof microcontroller toSWOof debugger.NRSTof microcontroller toNRSTof debugger. (Optional, only if you want to hard reset microcontroller using debugger)GNDof microcontroller toGNDof debugger.3V3of microcontroller to3V3of debugger.
Click on
Connect.Click on
SWV.Set
Core Clockto the microcontroller clock frequency configured inSTM32CubeMx. It is168MHzin this case.Click on
Start.
You can see the message “Hello World” on the SWV continously.
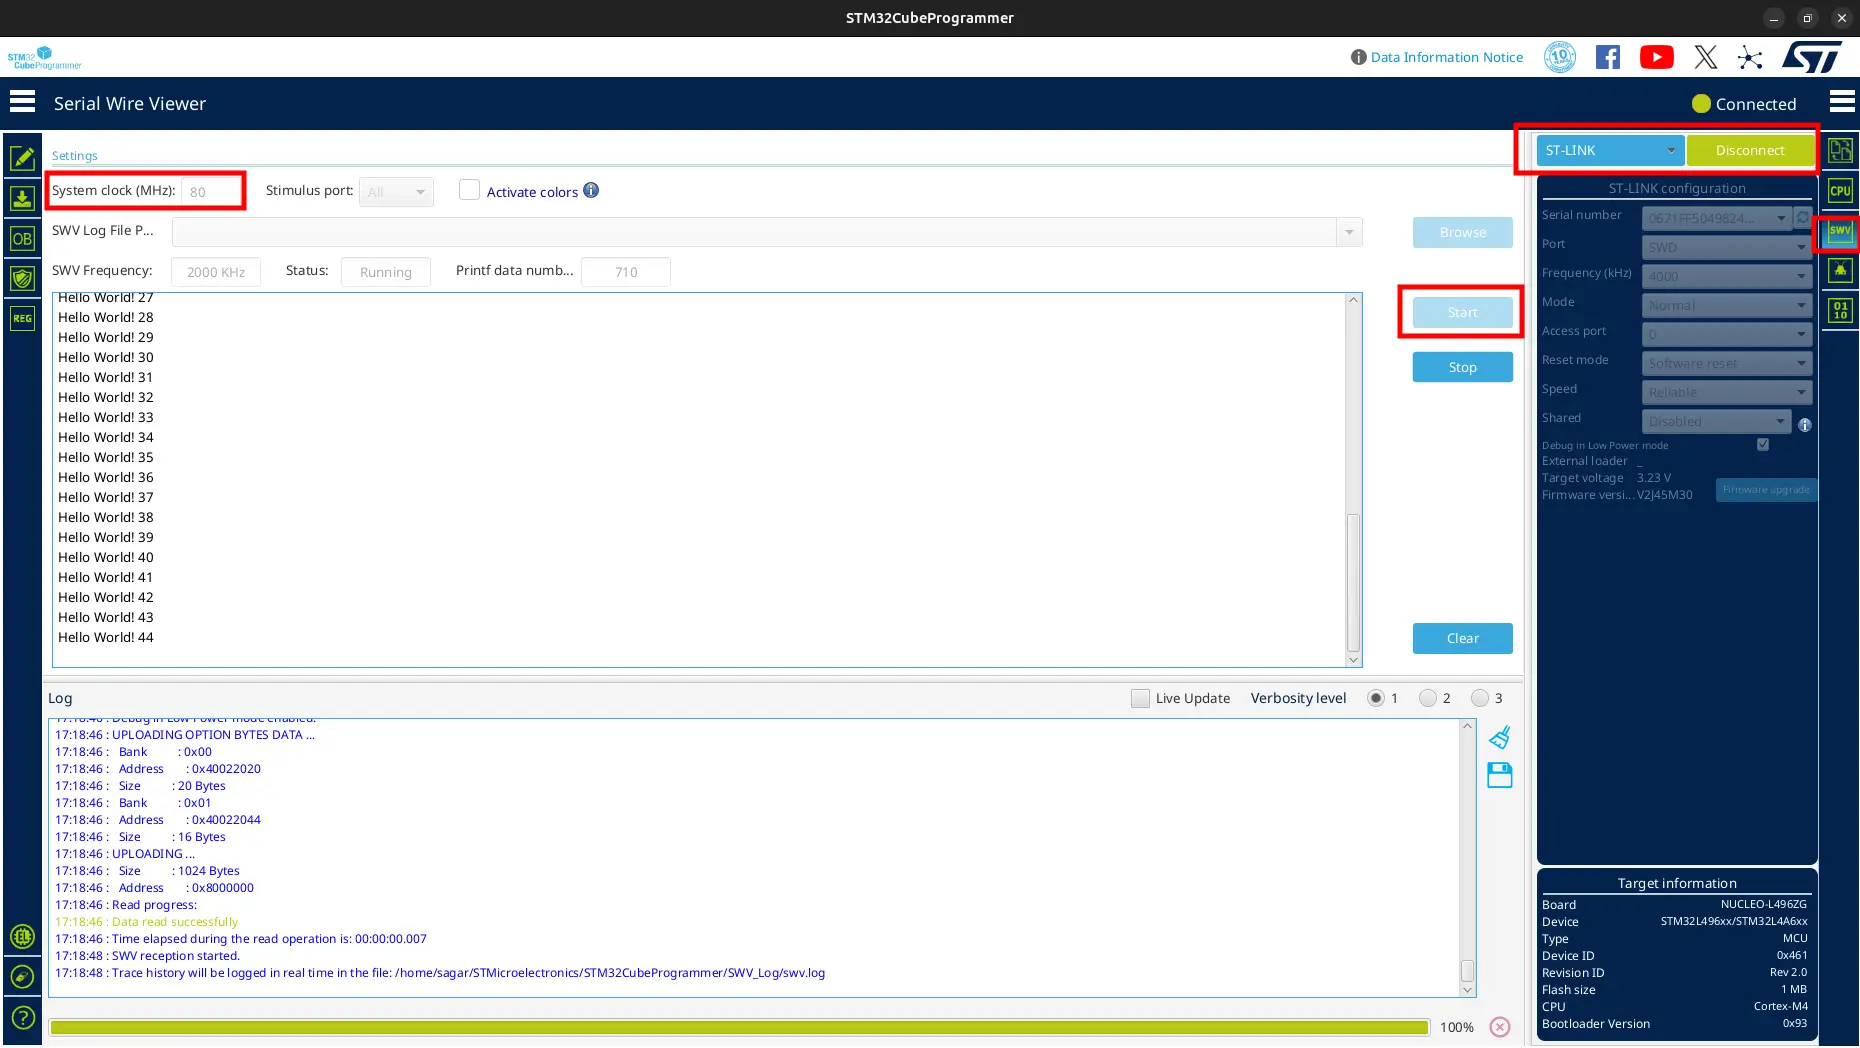
Do not be confused that I used 80MHz in clock frequency. I used different device at the time of this demo. Use your own.
5.2. Using STM32CubeProgrammer CLI
Use the following command to open SWV:
# STM32_Programmer_CLI -c port=swd -swv freq=<HCLK_freq_in_MHz> portnumber=0
STM32_Programmer_CLI -c port=swd -swv freq=168 portnumber=0
Then press
Rtoresetandstart. You can see the message “Hello World” on the terminal continously.Press
Sto stop andEto exit.Add
STM32_Programmer_CLIcommand at the bottom ofMakefileorCMakeLists.txt.1# Open SWV 2swv: 3 STM32_Programmer_CLI -c port=swd -swv freq=168 portnumber=0
# Open SWV
add_custom_target(swv
   COMMAND STM32_Programmer_CLI -c port=swd -swv freq=168 portnumber=0
)